Why Sunsets Are So Colorful From The Air

Many thanks to Boldmethod for sharing…  Source: Boldmethod

primaryGolfCharlie232

Seeing a sunset or sunrise from the cockpit is a view you’ll never forget. Here’s why they’re so stunning and full of color.

First, A Quick Review Of Sunlight

Sunlight, or visible light, can be thought of as a wave and a part of the electromagnetic spectrum. When the spectrum is split up, you see all the colors as a rainbow.  Each visible color has a different wavelength along the spectrum. Blue light has the shortest wavelength at 300 nanometers. Red light has the longest at 700 nanometers. As visible light passes through the Earth’s atmosphere, small particles in the air can scatter shorter wavelengths more efficiently, like what you see on the left side of the diagram below.

During the day, blue light is the primary wavelength that’s scattered in the atmosphere, and only a portion of the blue light is scattered. But when the sun is low in the sky during sunrise or sunset, all of that changes.

blue scatter small

“Scattering” Causes Colorful Sunsets

According to Steve Ackerman, a Meteorologist at the University of Wisconsin, Madison, “because the sun is low on the horizon, sunlight passes through more air at sunset and sunrise than during the day, when the sun is higher in the sky. More atmosphere means more molecules to scatter the violet and blue light away from your eyes. If the path is long enough, all of the blue and violet light scatters out of your line of sight. The other colors continue on their way to your eyes. This is why sunsets are often yellow, orange, and red.”

Wing SunsetBoldmethod

Red has the longest wavelength of any visible light, which is why the sun may appear red when setting directly on the horizon. The light has passed through the most atmosphere possible before reaching your eyes.

1GolfCharlie232

Why Are Some Sunsets More Colorful Than Others?

According to National Geographic, you may see more vibrant sunsets based on the seasons. In the east, fall and winter create incredible sunsets because the air tends to be dryer and cleaner for the path of sunlight.  Pollution tends to mute and muddy the colors of sunsets because large particles in the lower atmosphere tend to have that effect. And in general, places with a lot of haze have less dramatic sunsets.

2Wikimedia

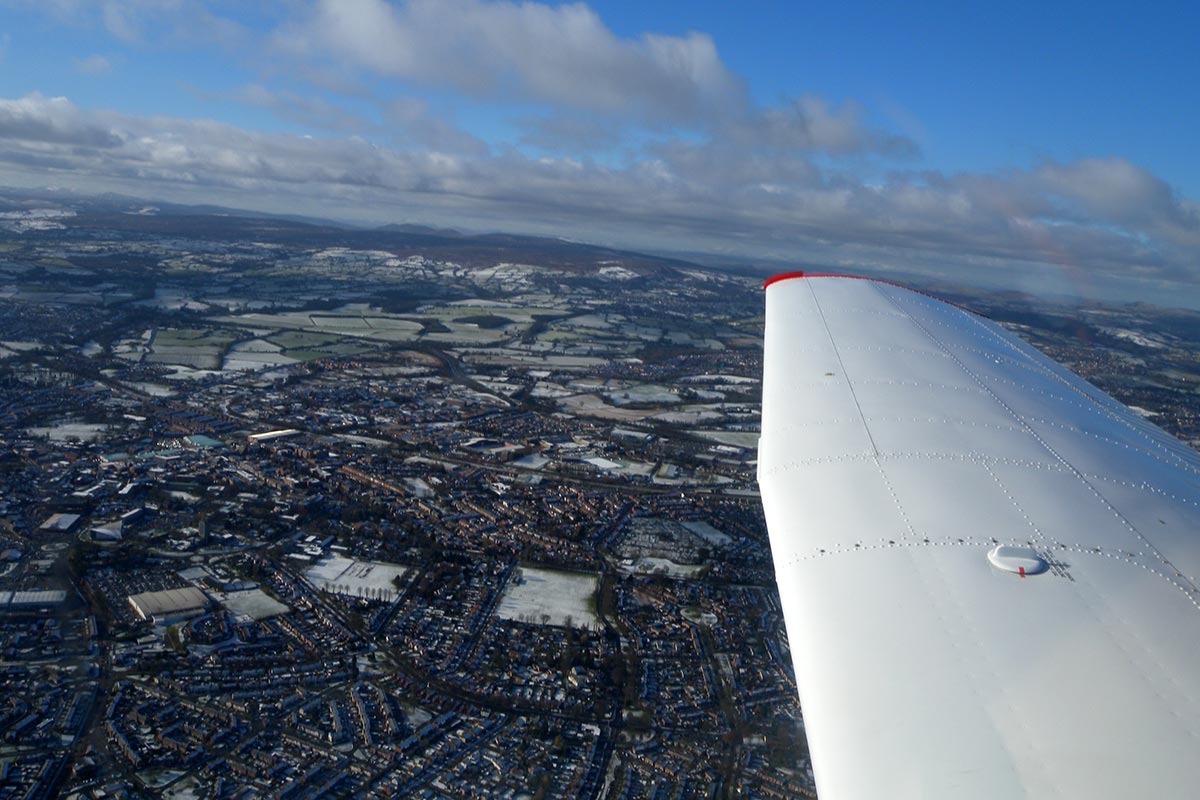
Why Sunsets Look So Great From The Air

When you’re flying through layers during climb or descent, you’ll find the best sunsets where the sun is clearly visible between multiple layers of clouds.  When sunlight is sandwiched between cloud layers, it bounces off the clouds, further intensifying the sunset. That’s why sunsets often times seem more spectacular from the air. On top of that, cloud layers can create dramatic shadows on the ground, or on other cloud layers.

3Swayne Martin

Where have you seen the best sunsets or sunrises? Tell us in the comments below.

Become a better pilot.
Subscribe to the Boldmethod email and get real-world flying tips and information direct to your inbox, every week.

Categories: Aviation, Flying, Microlights, Uncategorized | Tags: , , , , , | Leave a comment

5 Rules of Thumb Every Pilot Should Know  Boldmethod — Peter “Just Loves Flying”

5 Rules of Thumb Every Pilot Should Know  Colin Cutler

1) Estimating Your Crosswind Component

When you’re on the ground, it’s easy to use the crosswind chart in your POH, or an E6B. But when you’re in the air, neither of those options are very practical.

Lucky of all of us, there’s an easier way. If the wind is 30 degrees off the runway, your crosswind component is about 50% of the wind speed.

If the wind is 45 degrees off the runway, the crosswind component is about 75% of the wind speed.

And if the wind is 60 degrees or more off the runway, the crosswind component is roughly the same as the total wind.

crosswind component

2) 10% Weight Increase = 20% Takeoff and Landing Distance Increase

The more weight you have, the more runway you need. And while this rule is far from exact, it gets you in the ball park for a normally aspirated plane.

Obviously, when it comes time to calculate your actual performance, you’ll want to pull out your POH.

distance weight

3) Takeoff roll increases about 10% for every additional 1,000 feet of density altitude

For most normally-aspirated airplanes, you add about 10% of takeoff roll distance for every 1,000′ of density altitude (DA).

For example, in Denver, with an increase of 3,200′ of density altitude, you’d increase your takeoff roll by about 32%.

So if you have a 1,500′ takeoff roll on a standard day in Denver (3 degrees C), you’ll increase that roll to almost 2,000′ on a 30C day.

Denver-Takeoff

4) When Should You Start Your Descent?

3 degrees is a comfortable descent rate in just about any aircraft. But when you’re approaching an airport, how do you know when to start down?

Divide the altitude you need to lose by 300.

For example, if you’re at 11,000′, and you need to get down to a pattern altitude of 2,000′, you need to descend 9,000′.

9,000/300 = 30 miles.

If you start a 3-degree descent 30 miles out, you’ll hit pattern altitude as you reach the airport. Keep in mind, you’ll want to add a few miles on to your number, so you hit pattern altitude slightly before you get to the airport.

1-degree-descent

5) ILS Course Width

VFR pilots can make good use of the ILS too. Whether it’s a dark moonless night, or a long straight-in on a hazy day, following the ILS to your runway keeps you safe from terrain and obstructions (not to mention, you know you’re lined up with the right runway).

The closer you get to the runway, the more sensitive the signal is. As you cross the threshold, 1/2 dot deflection on the localizer = about 1/2 the runway width. So if you’re a half dot off as you approach the runway, you’re going to be looking at the runway edge lights.

ils-loc

What are other rules-of-thumb do you use? Tell us in the comments below.

Categories: Flying, Gambia, Microlights, Uncategorized | Tags: , , , , | 1 Comment

Flying in The Gambia

Flying in The Gambia is Simply Fantastic…

Categories: Aviation, Flying, Gambia, Microlights, Uncategorized | Tags: , , , , , , , , | Leave a comment

Flying in The Gambia

Flying in The Gambia, was and will always be, simply fantastic!!!

The seasonal Harmattan weather made it a little hazy but the flying was fantastic.

Categories: Aviation, Flying, Gambia, Uncategorized | Tags: , , , | Leave a comment

7 Steps will guide you from final approach to touchdown.

Thanks to Boldmethod for sharing…

Crosswind landings can be intimidating, but these 7 steps will guide you from final approach to touchdown.

1) Wind Check

When you’re on final at a towered airport, ask ATC for a wind check. An instantaneous wind reading gives you a good idea of what you’re correcting for. And if you’re at a non-towered airport, look for the wind sock. There’s at least one visible from the end of each runway.

1Boldmethod

2) Monitor Your Speed

You should be established on your final approach speed (-0/+5 knots). When you fly the right speeds, you can spend more time focusing on the landing, and less on worrying about getting slow or fast on final.

2Boldmethod

3) Flying A High Wing Plane? Less Flaps Might Be The Key.

Some aircraft manufacturers recommend using partial flaps in strong crosswinds. Check your POH. If they recommend it, you’ll have an easier time managing your touchdown.

3Boldmethod

4) Transition From Crab To Slip

Initially on final, you’re pointed into the wind, wings-level, to maintain a straight ground track on the extended centerline of the runway. But as you approach the threshold, you’ll enter a side-slip for touchdown. Use rudder to align the nose with the runway, and use ailerons to prevent drifting upwind or downwind. It takes some practice, but we have great examples of what it should look like here.

primaryBoldmethod

5) As You Flare, Increase Control Inputs

As you flare, you’re slowing down, and that makes your flight controls less effective. Slowly add more rudder and aileron during the flare to keep yourself aligned with the runway, all the way to touchdown.

5Boldmethod

6) Upwind Wheel First

In the perfect crosswind landing, you’ll touch down on the upwind wheel first, followed by the downwind wheel, and then finally the nose wheel.

6Boldmethod

7) Wind Correction After Landing

Once the aircraft is on the runway, don’t release the controls. Gradually increase your ailerons into the wind, so that a gust of wind doesn’t lift your upwind wing.

7Boldmethod


Want to immediately improve your takeoffs and landings? Check out our Mastering Takeoffs and Landingsonline course. Plus, if you order now through Saturday, November 25th at 11:59PM Pacific, you’ll get a free Boldmethod shirt with your order! Learn more and sign up now.

Categories: Aviation, Flying, Gambia, Uncategorized | Tags: , , , , | Leave a comment

Two Easy Rules of Thumb For Calculating a Three Degree Glide Slope

Source: Two Easy Rules-of-Thumb For Calculating a Three-Degree Glide Slope | Boldmethod (Thanks to boldmethod for sharing and keeping us safe)

Two Easy Rules-of-Thumb For Calculating a Three-Degree Glide Slope

 Have you ever found yourself chasing the glideslope on an ILS approach? There’s an easier way to do it.Groundspeed has a significant effect on descent rate, and there’s a formula you can use to ballpark your feet per minute (FPM) descent, even before you get on glideslope.

One of the most important parts of instrument flying is getting ahead of the airplane. The following formulas are a great way to do just that. In many glass cockpit aircraft, wind vectors and ground track diamonds mean you’ll have a easily visible references to use. GPS groundspeed will make the following equations extremely easy to use…

primary1Boldmethod
Option 1: Multiply Your Groundspeed By 5

If you’re flying your aircraft on a roughly 3 degree glideslope, try multiplying your groundspeed by 5 to estimate your descent rate. The result will be a FPM value for descent that you should target. As you capture the glideslope, make adjustments as necessary.

gs x 5
Option 2: Divide Ground speed In Half, Add “0”

Divide your ground speed in half, add a zero to the end, and you’ll have an approximate FPM of descent. This is another easy way to target an initial descent rate for a 3-degree precision approach, or even a VFR descent into an airport.

divide in half

Both formulas leave you with the same result. Choosing which formula to use comes down to which mental math you’re more comfortable with.

How Wind Affects Descent Rate

A tailwind on final will result in a higher groundspeed, thus requiring a higher descent rate to maintain glideslope. The opposite is true for headwinds. Let’s take a look at a few examples:

Example 1: Headwind of 25 Knots, Final Approach Speed of 100 Knots Indicated Airspeed.

example1

Example 2: Tailwind of 25 Knots, Final Approach Speed of 100 Knots.

example 2
Useful For More Than Just ILS Approaches

Looking for a good way to plan out your 3 degree glideslope? These formulas are great references for LPV approaches, LNAV+V, or even long VFR straight in approaches.

primarygc232

Have you used these formulas before? Tell us how you use them in the comments below.


Categories: Aviation, Flying, Microlights, Uncategorized | Tags: , , , | Leave a comment

The Sounds of Nature

Thanks to snapshotsincursive for sharing.

“The three great elemental sounds in nature are the sound of rain, the sound of wind in a primeval wood, and the sound of outer ocean on a beach.” ~ Henry Beston

via The Sounds of Nature — snapshotsincursive

Categories: Nature, Uncategorized | Tags: , , , , | Leave a comment

9 Things That Can Be Easily Overlooked During Preflight 

Source: 9 Things That Can Be Easily Overlooked During Preflight | Boldmethod

(Thanks to Boldmethod for sharing)

1) Mandatory inspections

It’s important to verify that all required inspections are met for the aircraft you’re flying. You don’t want to compromise the safety of you and your passengers by flying an aircraft outside of its inspection windows, and you don’t want to have to explain why you flew an aircraft outside of mandatory inspections to the FAA, either.

1Capwatts86

2) Required documents

At the start of each preflight, make sure your aircraft has all the required documents on board. Remember the acronym ARROW which stands for Airworthiness, Registration, Radio Station License, Operating Manual, and Weight and Balance.

2Jack Snell

3) Fuel quantity

Never rely solely on the fuel quantity indicators. Make sure you visually check your fuel tanks to make sure you have enough gas for your flight.

1fireboatks

4) Pitot tube drain hole

You should always make sure that the pitot tube is open, as well as the drain hole. If you end up flying through precipitation, you want to make sure that your pitot tube is draining properly, so your indicated airspeed isn’t affected.

4JPC24M

5) Landing gear condition

Instead of skimming over the tire and saying “It looks good to me!”, make sure you actually check that the tire has proper inflation and that the tread isn’t worn down. It’s also important to make sure that the brake pads are intact, and that there isn’t any hydraulic fluid leaking.

5Anne Worner

6) Bottom of the fuselage

While it may seem unneeded, it helps you make sure there aren’t any dents on the bottom of the aircraft, tail strikes, or debris from prop blast. You also want to make sure there isn’t any excessive oil dripping, and that the avionics antennas are still intact before you go.

primary

7) Contaminants on the wings

When it’s below freezing, it can be easy to overlook contaminants on the wing like frost and clear ice, which both have adverse effects to your aircraft’s performance.

NTSB Frosted Wing

8) The propeller

Take your time to do a thorough inspection of the propeller. Make sure that both the leading and trailing edges of the propeller are smooth, and don’t have nicks or cracks. In addition to the visual inspection, you can also perform an audible test on composite props. Gently tap on the propeller from the hub to the propeller tip with a metal coin. If the tapping sounds hollow or dead, your prop could be delaminated, and you should have a mechanic check it out.

8RM Bulseco

9) Fuel filler caps

Double check them before you fly! If they’re not properly attached, you could risk fuel leakage from the top of the wing, which could make for a bad day.

primaryjay-jerry

What else is easy to miss on preflight? Tell us in the comments below.

Categories: Aviation, Flying, Gambia, Microlights | Tags: , , , , , | Leave a comment

Create a free website or blog at WordPress.com.